Award Winning Solutions
Xena has won multiple global awards for price/performance and technical innovation. Learn more.

Technical Expertise
Copyright © 2009-2024 Teledyne LeCroy Xena ApS, Denmark
In this example, you will learn how to manage your Safire chassis, including chassis IP address management, software update, identity and access management, support archive generation, and color theme.
Click the settings icon on the navigation bar. This will direct you to the Settings page.
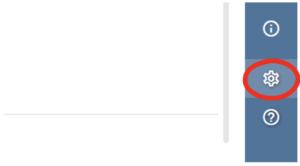
Click button SETTINGS
Use Settings > System > Management Interface to change the chassis IP address by entering IPv4 address, IPv4 subnet mask, and IPv4 gateway, and then click APPLY CHANGES. Safire will automatically reboot and apply the change.
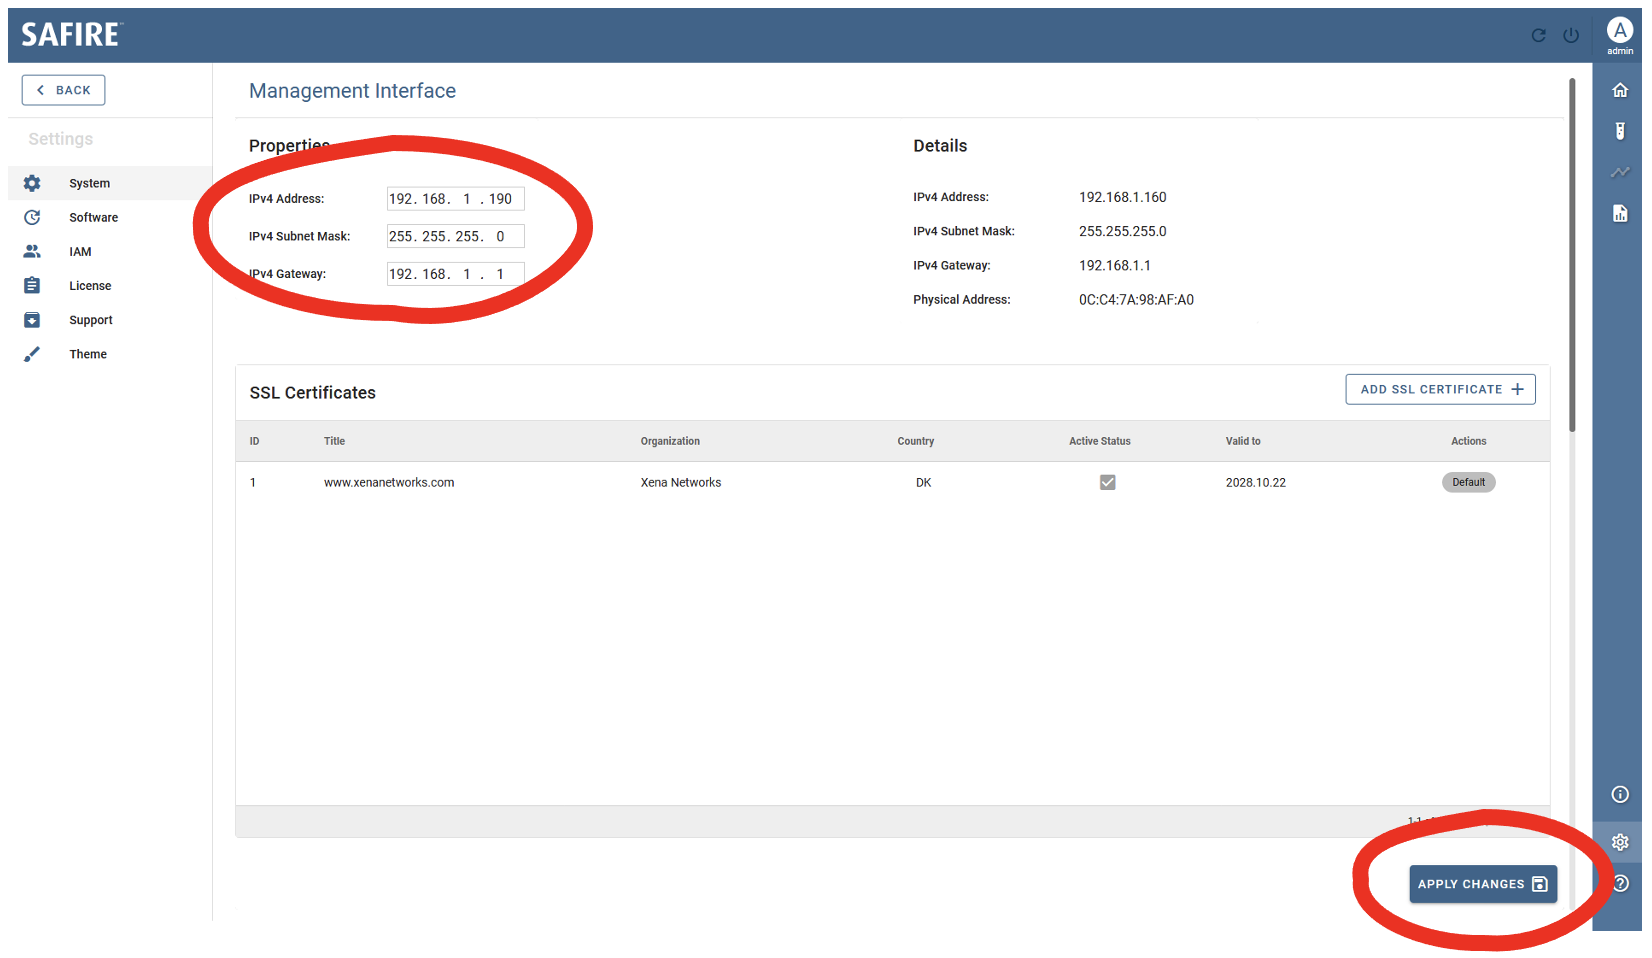
Change chassis IP address
Go to Settings > System > SSL Certificates, and click ADD SSL CERTIFICATE to add your SSL certificate to the management plane, and then click APPLY CHANGES. Safire will automatically reboot and apply the change.
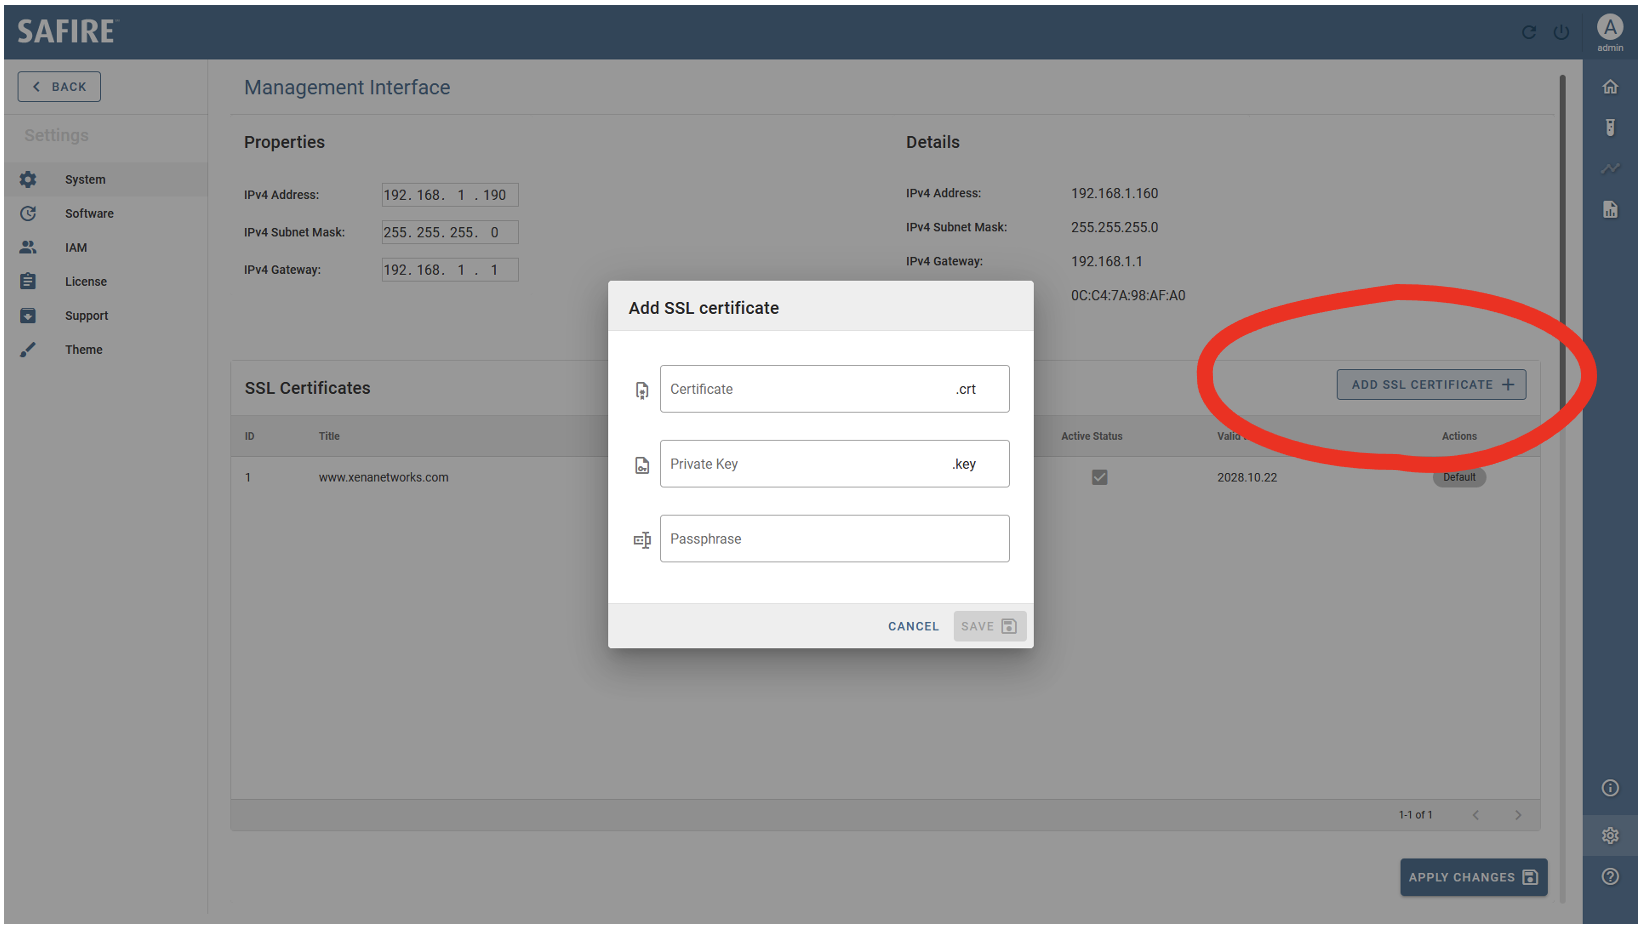
Change management SSL certificate
Download the .ximg file you need. The filename should start with safire- followed by the version number, e.g. safire-v2.0.0.ximg. This is the only image file you need for updating your Safire chassis. Then just follow the steps below to update your chassis:
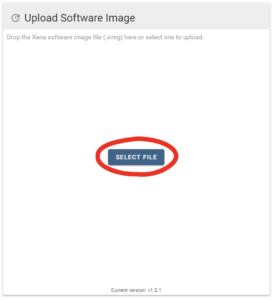
Drag and drop your Safire image file here to update the software
Go to Settings > IAM > Identity and Access Management and click CREATE NEW USER.
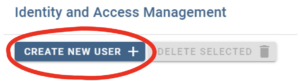
Click CREATE NEW USER to create a new Safire user
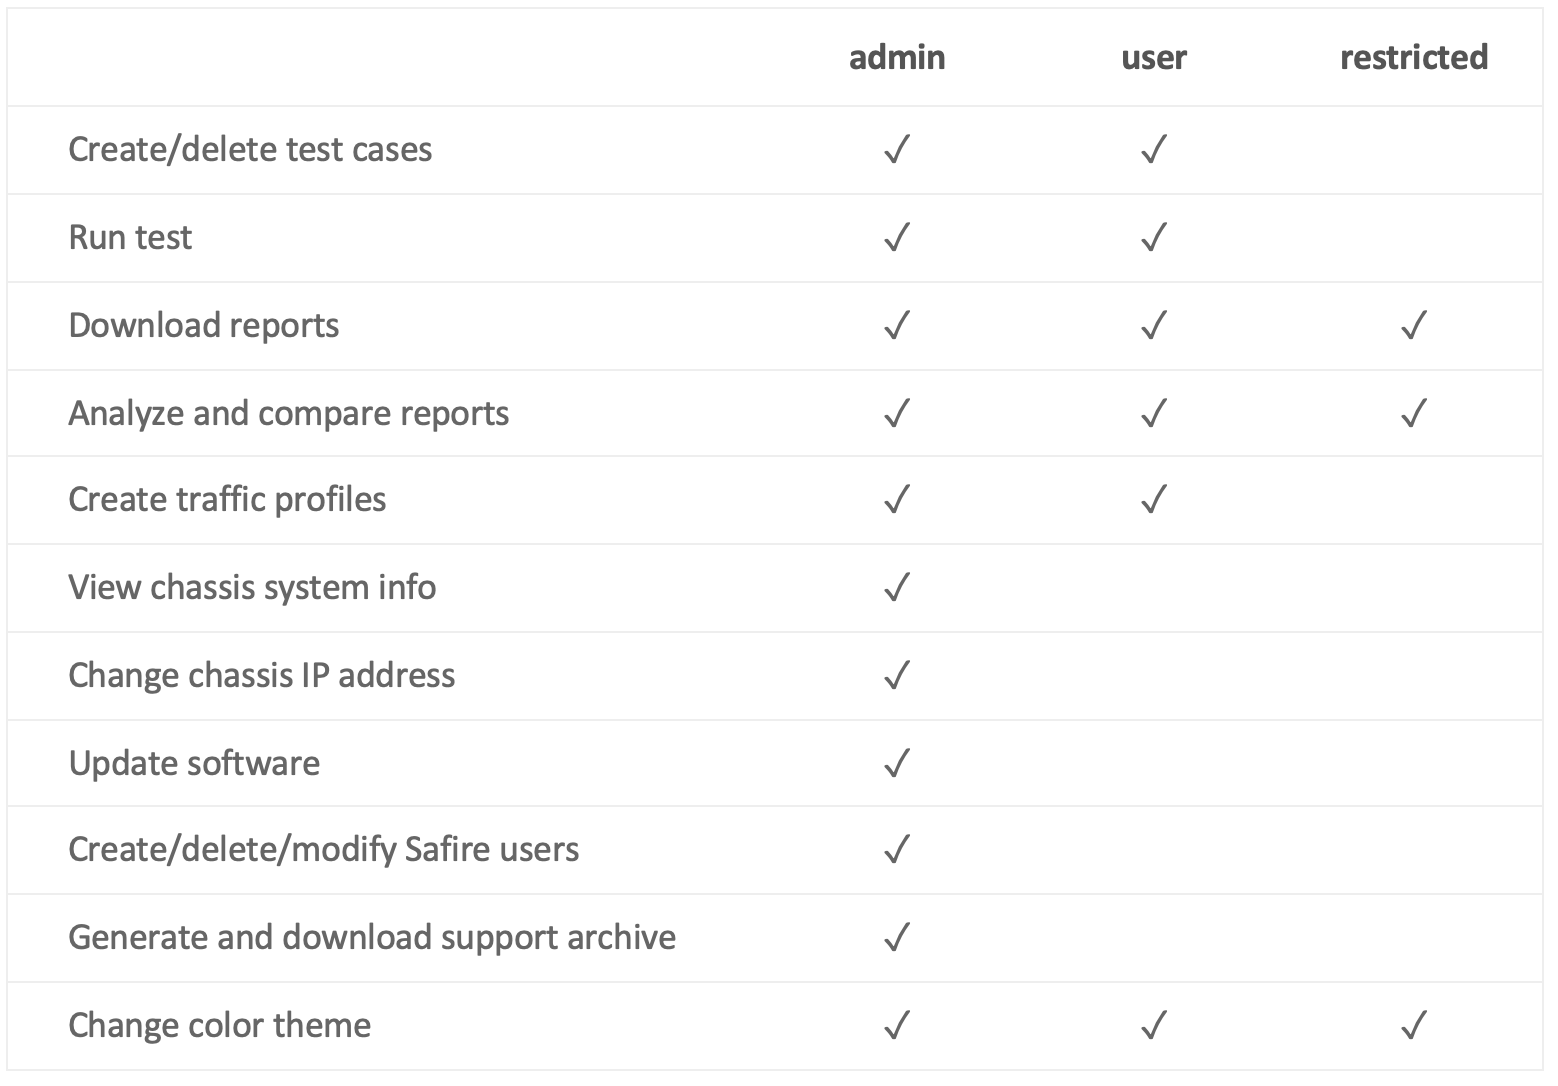
Safire supports three different roles with different authorization levels, as illustrated by the table below:
Table: Safire user role authorization levels
Go to Settings > License > License Management to update and view your licenses.
Click LAUNCH LICENSE PORTAL to go to Xena License Portal to manage your device licenses.
Click MANUAL UPDATE to upload your license file to the chassis.
Click AUTO UPDATE to let your browser automatically downloads the license from the internet and upload it to the chassis.

SELECT LICENSE FILE to upload a license file
Go to Settings > Support, use the switch button called Enable Logging to enable or disable detailed logging for the support archive.
If logging is enabled, a detailed command log will be included in the support archive. This will help Xena Support to debug problems you have encountered.
If logging is disabled, only system event log will be included in the support archive. Disabling the logging function help also increase the SafireManager’s responsiveness.

Logging disabled
Logging enabled
Go to Settings > Support Archive, add your comment and click DOWNLOAD SUPPORT ARCHIVE.
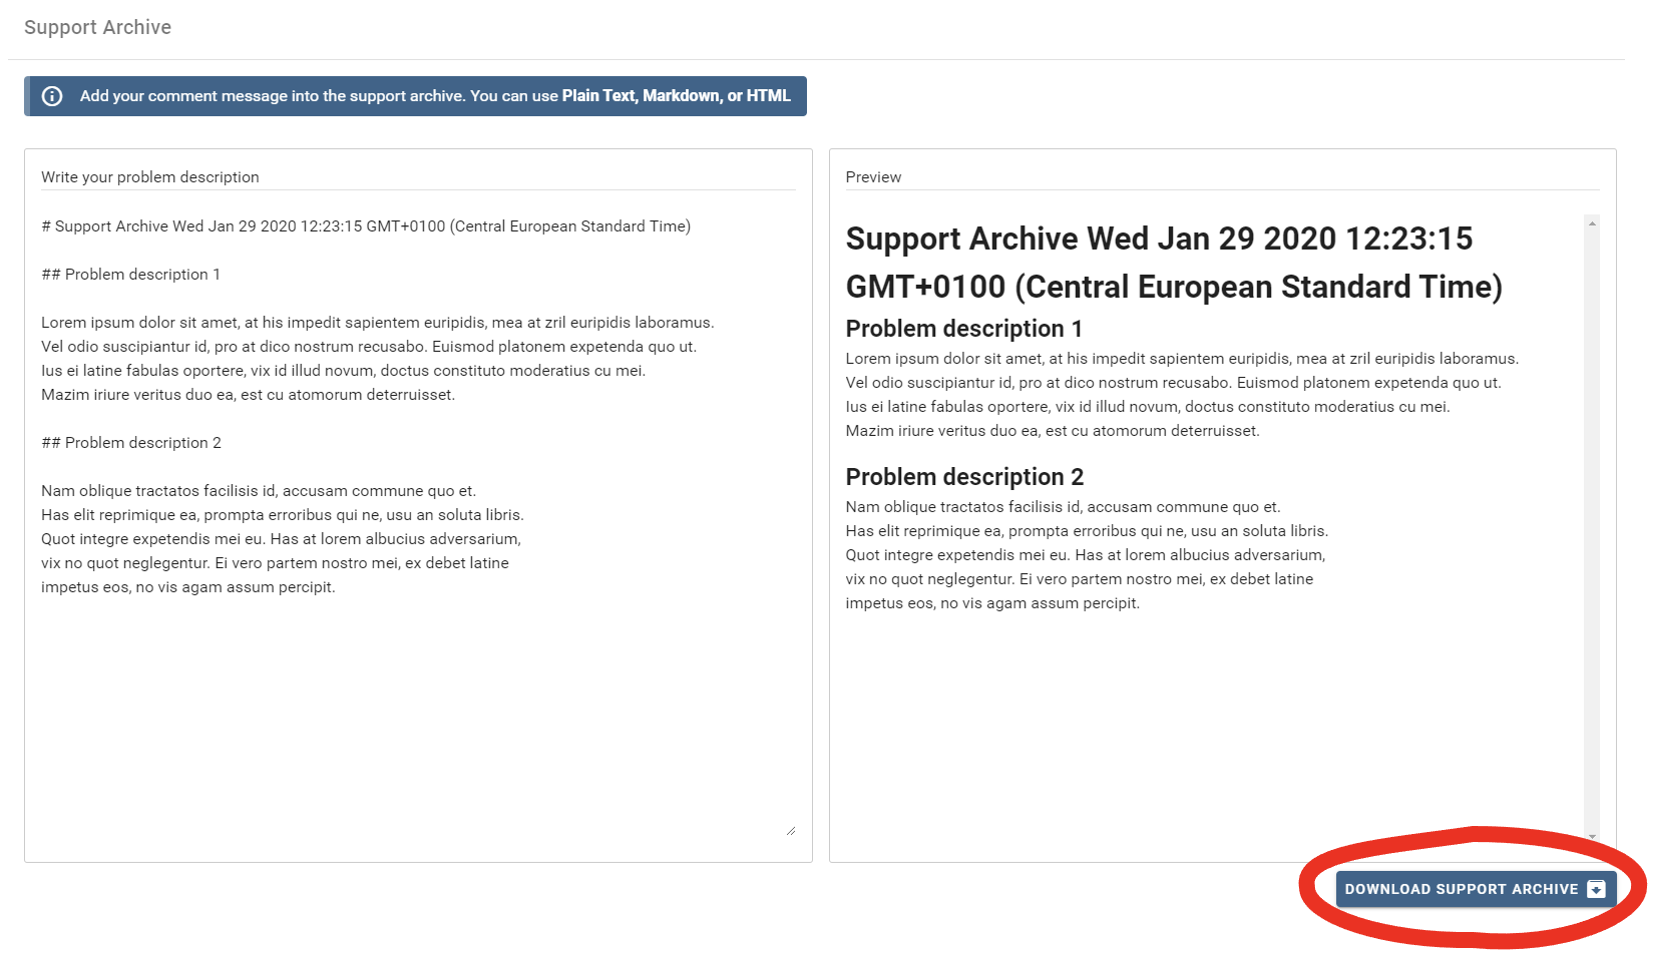
Write description and comments and click DOWNLOAD SUPPORT ARCHIVE
To back up chassis configuration, go to Settings > System > Reset and Restore, and click DOWNLOAD BACKUP. The backup file contains test case configurations, test results, and traffic profile configurations.
You can restore your test cases, test results, and traffic profiles by clicking RESTORE FROM BACKUP FILE and uploading the backup file.
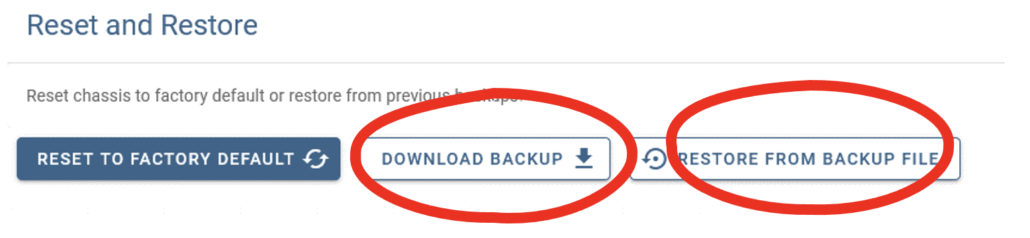
Chassis backup and restore
To reset the chassis back to factory default, click REST TO FACTORY DEFAULT.
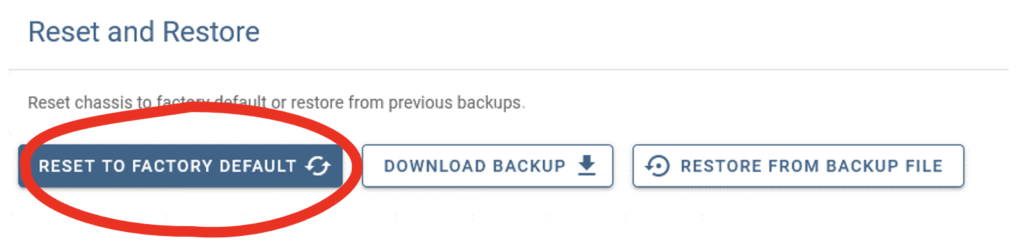
Chassis reset
Click the power off button to shut down the chassis.
Click the reboot button to restart the chassis.
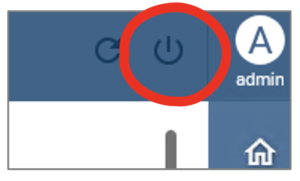
Chassis power off
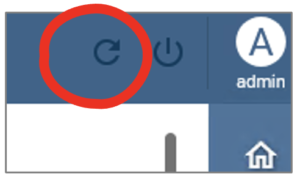
Chassis reboot
Click the user icon and click the log off icon to log off the current user.
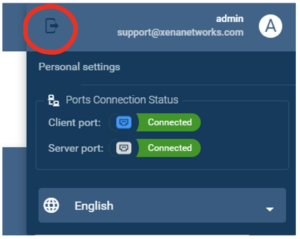
User log off
Xena has won multiple global awards for price/performance and technical innovation. Learn more.
Copyright © 2009-2024 Teledyne LeCroy Xena ApS, Denmark